
Creating a weekly heatmap of traffic or conversions is one of my favorite data visualisation tips for Google Analytics users. Sometimes this level of granularity just obscures the most important time related features of the data.
For example, during the last couple of years, I have worked with several b2b clients. For them, it is very often enough to split the traffic in two separate segments:
- sessions during office hours
- sessions during all the other hours.
This can be used for e.g. limiting the remarketing only for those visitors who visited the website during local office hours. One way to achieve this is to use a session level custom dimension based on the local time of the day.
This is pretty simple as long as you have some elementary scripting skills. And if you just copy and paste the script from here you don’t even need to write a single line of code yourself.
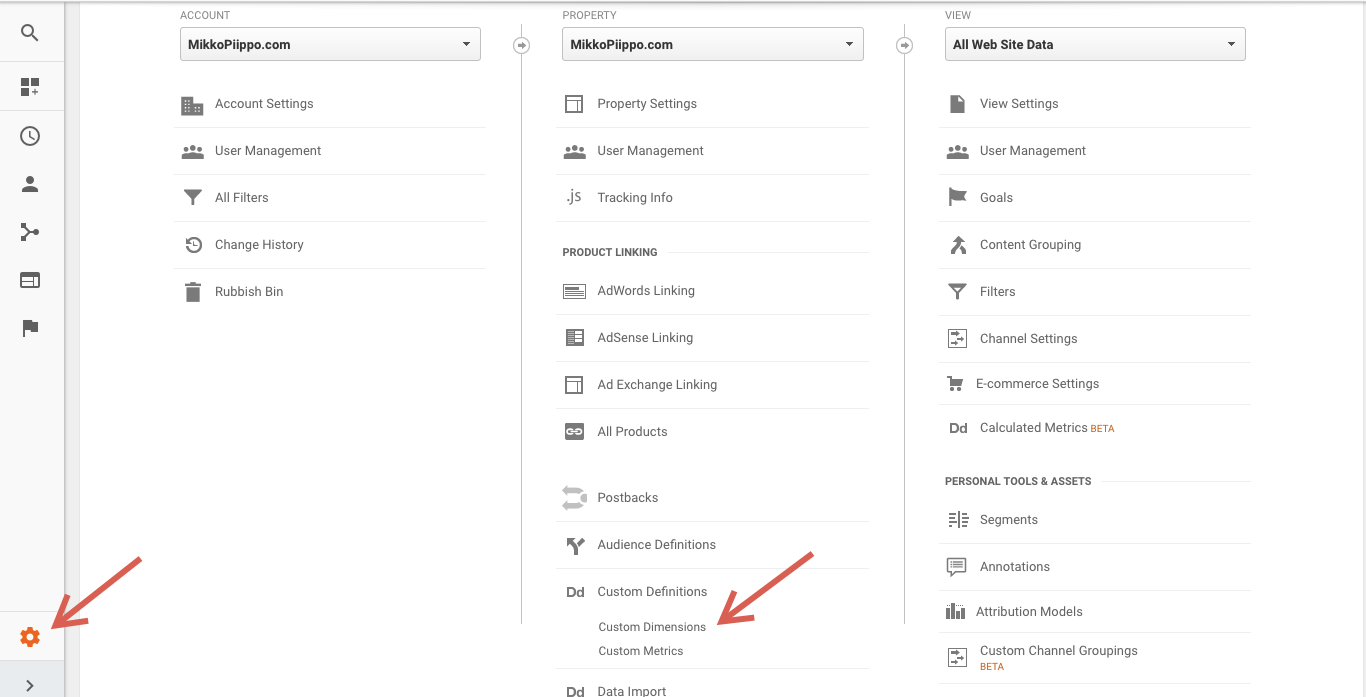
Configure the custom dimension in Google Analytics
First, you need to add a custom dimension to your Google Analytics property.
First navigate to property settings:
Next you Add Custom Dimension. You can give it whatever name you like. I prefer to use session as scope for this custom dimension. If you want to have more granular data, you can also use hit as the scope.
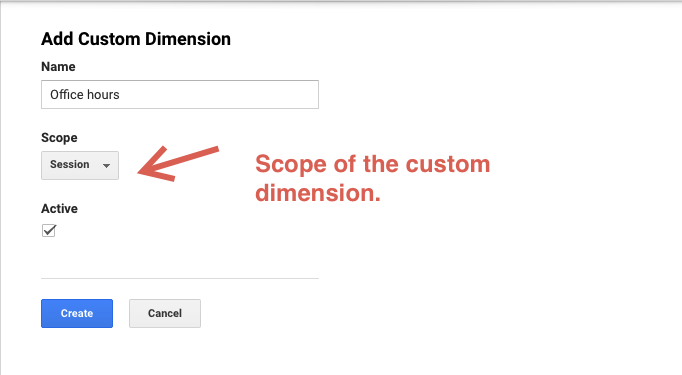
Click Create and Done. You don’t need any of the scripts shown to you as we will use Tag Manager instead.
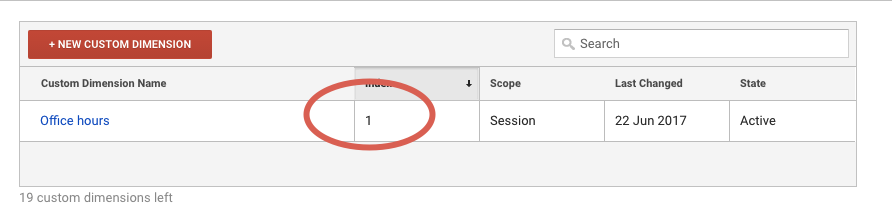
Just remember what the index of this dimension is as you will need to use it later.
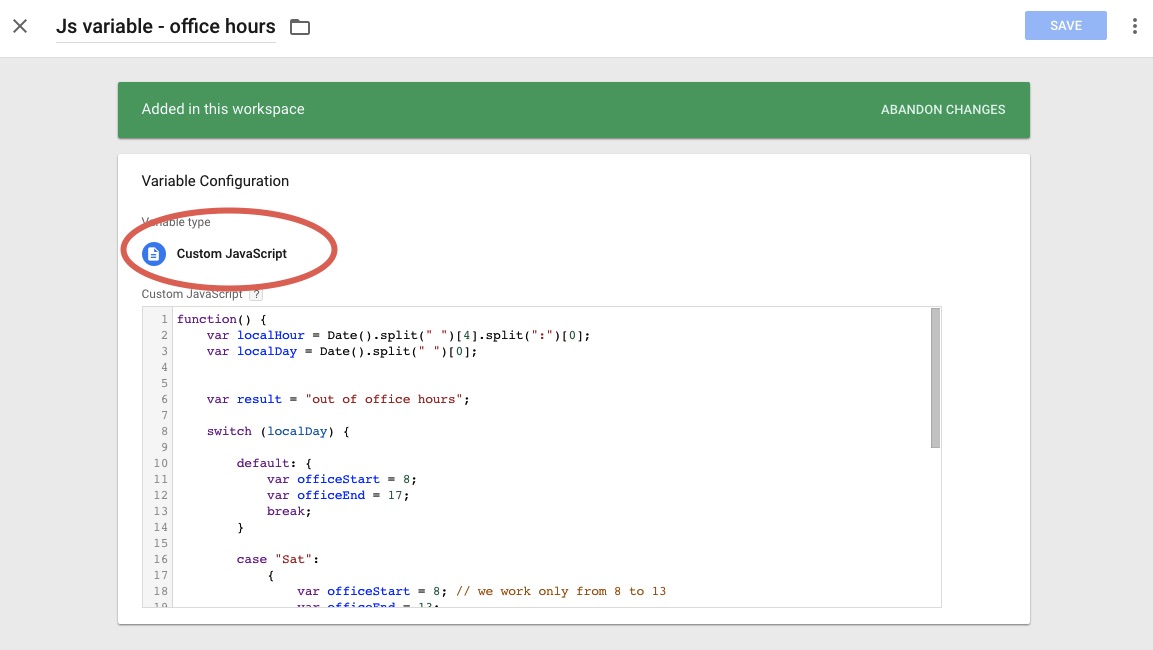
Custom javascript function returning the local day and hour
First a warning: I’m not a javascript developer. Actually I’m not a developer at all, just an analytics consultant trying to hack together some simple code. My solution is definitely not elegant and any halfway competent javascript developer would probably improve it in many ways.
So, proceed at your own risk from here…
This is the javascript code you will need:
function() {
    var localHour = Date().split(" ")[4].split(":")[0];
    var localDay = Date().split(" ")[0];


    var result = "out of office hours";

    switch (localDay) {

        default: {
            var officeStart = 8;
            var officeEnd = 17;
            break;
        }

        case "Sat":
            {
                var officeStart = 8; // we work only from 8 to 14
                var officeEnd = 13;
                break;
            }

        case "Sun":
            {
                var officeStart = 25; // always false, out of office :)
                var officeEnd = 0;
                break;
            }
    }


    if (localHour >= officeStart & localHour <= officeEnd) {
        result = "office hours";
    }

    return (result);
}
This simply reads the current date and time before splitting it to day of the week and hour.
First, we set the defaults for officeStart and officeEnd. In this case, we define the hours between 08 and 17 to be office hours. The other hours are out of office hours.
Next, we can redefine the office hours based on the day of the week. For example, in a b2b context in Finland Saturdays and Sundays are in most cases “out of office hours.” Just tweak the rules for your own specific (local) needs.
Finally, the are used as rule for returning either “office hours” or “out of office hours”.
Use this code as a custom javascript variable in Google Tag Manager.
Use the javascript variable in the page view tag
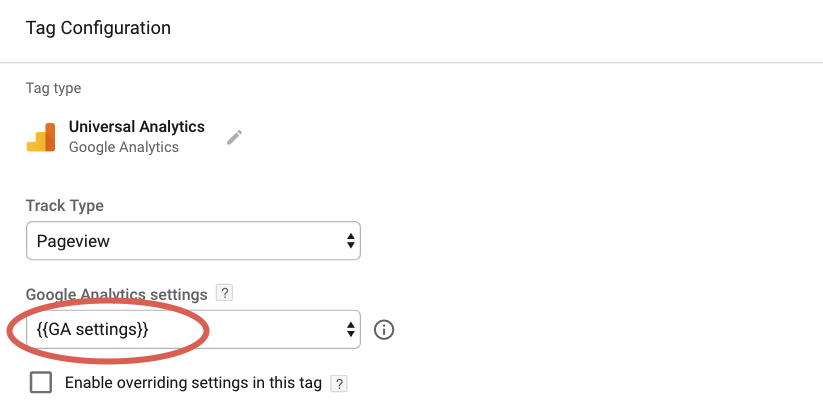
Next, we use the javascript variable for setting the custom dimension in Google Analytics page view tag (and other relevant tags).
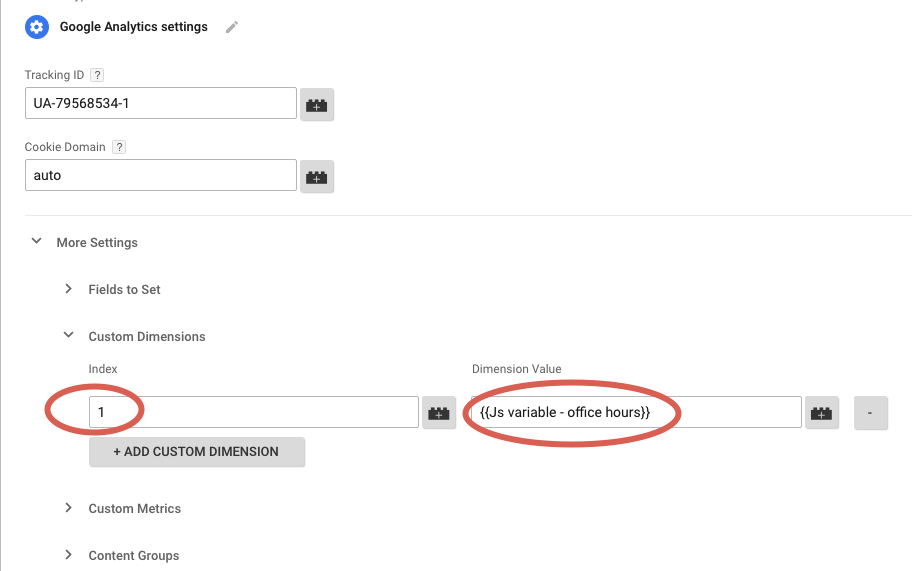
Using the Google Analytics settings variable is the easiest way to do this. Under More settings you can send the value of our javascript variable to the custom dimension we already defined in Google Analytics.
(This is where you need the index of the custom dimension!)
Finally, remember to use this variable in your pageview and event tags. Only then the data will actually be sent to Google Analytics.
Finally, preview the changes, submit and publish the container.
Create segments based on your custom dimension
By now you are certainly eager to see your new custom dimension in action. Unfortunately, you need to wait up to 24 hours before you can actually see any data in your reports.
Meanwhile, you can create some segments, dashboards or custom reports based on the new custom dimension.
For example, with this segment you’ll see only the session during the office hours. In the same way, you should create another segment for Out of office hours.

And of course, you can use the custom dimension in your dashboards:

Now it is easy for you to:
- Segment your visitors based on your definition of office hours to identify behavioral patterns
- Create remarketing audiences based on your segments based on the segmentation
One reply on “How to use office hours as a custom dimension in Google Analytics”
Hey that is a neat thing you have got there. Very useful and immediately applicable. I think I’ll put this on our site too.
Did you find any correlations or actionable data from this yourself? Would it not be more useful for b2bs who only do business in one time zone?